Disclaimer
A camera is not a photo scanner. If you need a very colorimetric image, consider using a flatbed photo scanner first. A flatbed photo scanner cannot fit three-dimensional objects, but in the first place, they don’t fit well to the usual color management.
Prerequisite knowledge
The color management is, usually (there are non-usual special color managements), about final products. It manages just final products, not everything in the world. It assumes printed paper as final products. An ICC based color managed image can be a good visual representation of a flat object like printed paper or a computer screen. But not for a three dimensional object.
Do you remember about ideal gas? There is such a thing in the usual color management too. The name is ‘perfect reflecting diffuser’ (PRD). Helium is close to ideal gas. Just like it, barium sulphate (baryta) is close to PRD. Baryta doesn’t absorb almost any visible light (very white), and just diffuses it without directivity (matte). Real baryta isn’t PRD, so we need to adjust the difference. Anyway PRD’s reflectance is an important reference point in the usual color management, because common printing uses non-directional colorants. In the usual color management, inks or paints are treated as colored (light-absorbing) baryta.
If nothing on the object is brighter than PRD, it is very convenient to adopt PRD’s reflectance as the maximum point of the image. The usual color management expects it implicitly. Everything is flawless while you handle only such objects.
In the real world, sometimes, PRD’s reflectance is not the maximum point.
The most common case is photo paper. It is often brighter than PRD because it often contains fluorescent whitening agents. In this case, we can manage to do by cheating the maximum point.
Fluorescent colorants are common too and much more problematic. Fluorescent orange jackets are quite common, and they often trouble TV camera operators. Haven’t you ever seen fluorescent orange jackets look awkwardly on TV? They easily exceed PRD’s reflectance and cause clipping. In this case, we should go beyond the usual color management. In TV and movies, HDR is it, theoretically (actually? I don’t know). But in the usual printing world, there is no such a thing yet. (There are non-usual special things available with much money, of course.)
The real objects in the real world are not perfect matte. They have specular highlights. In this case, usually you should avoid large highlights by lighting arrangements. Small highlights are fine to be clipped. But in some non-usual cases, you should handle brightness above PRD’s.
Prerequisite tools
- Raw capable and external flash capable camera
- X-Rite ColorChecker Classic (Macbeth chart) or Digital SG. Genuine one. Never touch rip-offs.
- X-Rite ColorChecker Camera Calibration (app)
- Gray card. Genuine one.
- External Xenon flashes and diffusers
- Photoshop
(Do you need a Xenon flash, not other illuminants?)
Arrangements of lighting and camera
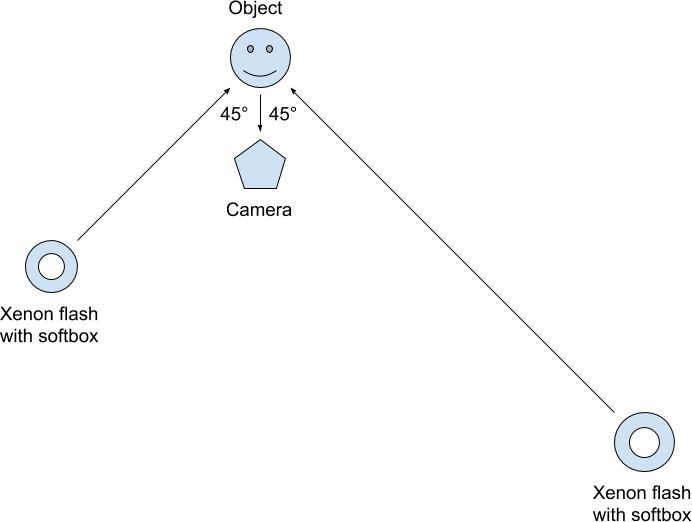
I recommend two flashes. In most cases, a flash makes noticeably uneven light. Both should be placed on the left and right of the camera. No need to be symmetric. Adjust the guide numbers and arrangement to get even light.
Adjust the camera’s white balance and exposure by the gray card. Take a photo of the Macbeth chart. Then take a photo of the object.
Calibration
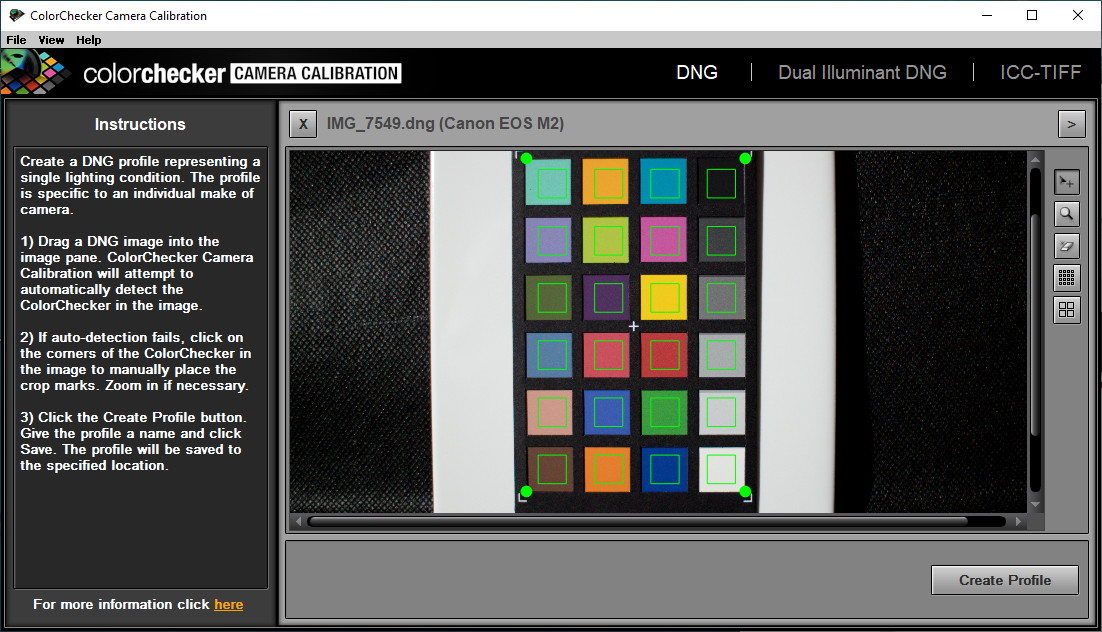
Convert the raw files to DNG. Open the Macbeth chart’s DNG by ColorChecker Camera Calibration and create DCP (Digital Camera Profile).
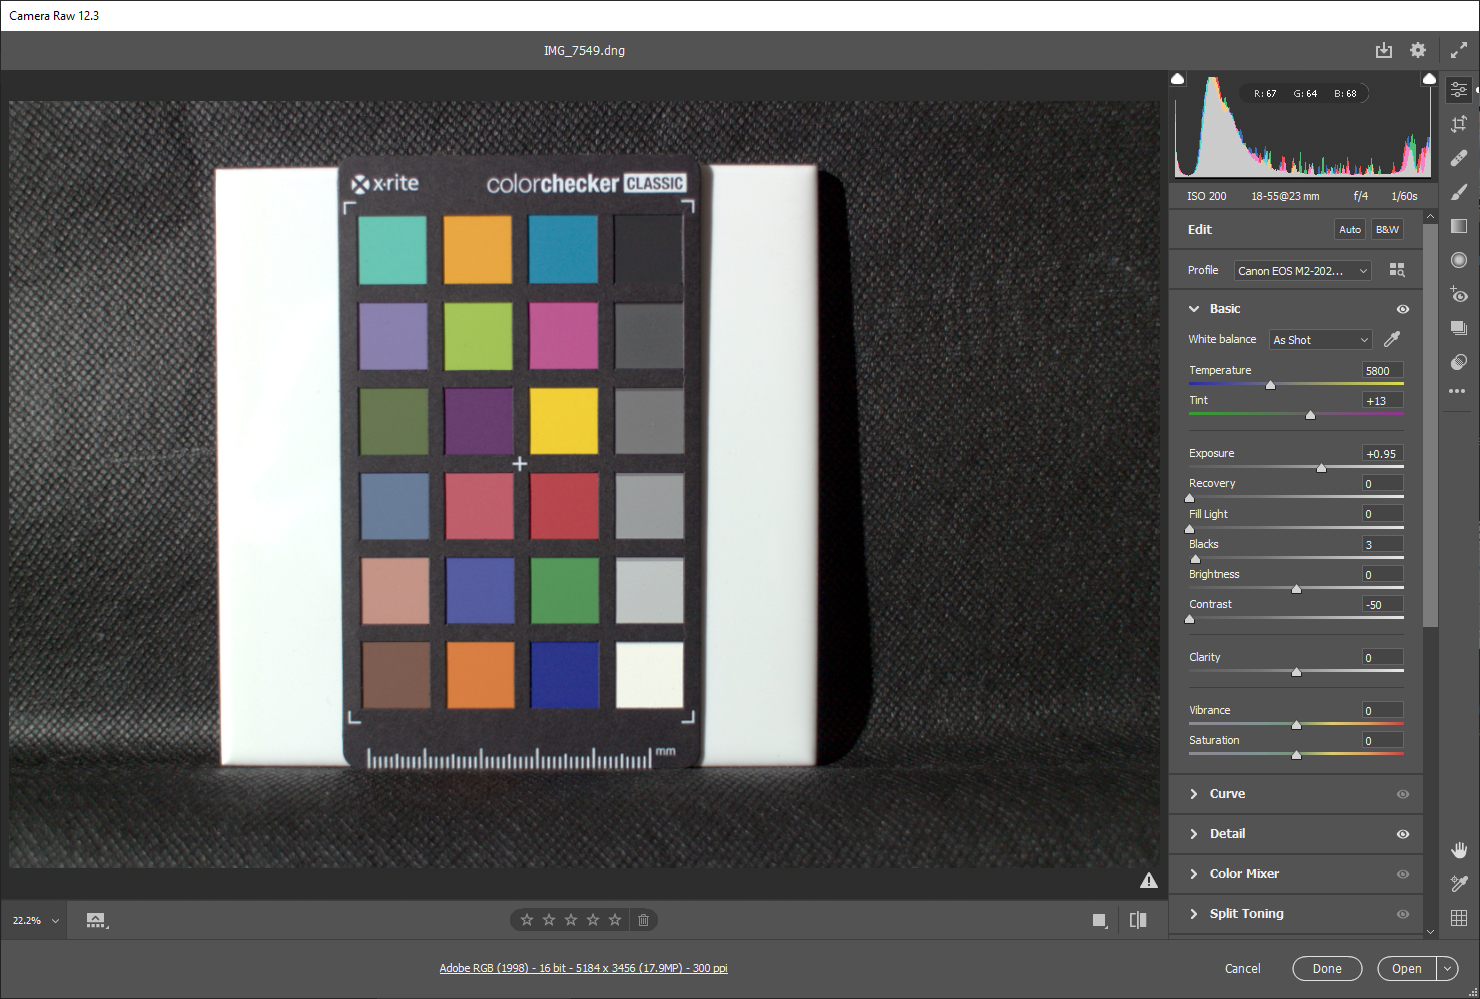
Launch Photoshop and open the Macbeth chart’s DNG. Choose DCP which you created just now. Choose Adobe RGB 16-bit. Click ‘Lens Correction’ and enable profile corrections.
Let’s get down the main topic of this article.
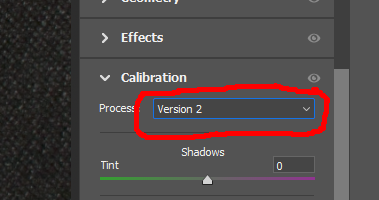
First, open ‘Calibration’ and set the process to ‘Version 2.’ After the version, colorimetric calibration is nearly impossible.
In Camera Raw, you can see RGB value at the mouse pointer. The color of the Macbeth chart is well known. This is an extract of gray patches. PRD is (255, 255, 255), of course.
| Name | R | G | B |
|---|---|---|---|
| 9.5 | 240.7 | 241.2 | 235.0 |
| 8 | 200.1 | 200.9 | 199.8 |
| 6.5 | 160.3 | 161.7 | 161.3 |
| 5 | 119.9 | 120.1 | 119.8 |
| 3.5 | 83.9 | 84.8 | 85.2 |
| 2 | 52.9 | 52.9 | 53.5 |
Adjust the exposure / blacks / brightness / contrast and others in Camera Raw and make your image close to the RGB values above. Blacks 3, brightness 0, and Contrast -50 are a good start point. You cannot make it exactly the same, just make it close.
Click ‘Open Image’ and continue to Photoshop’s main window, and you can see the limitation of your camera’s colorimetric ability by comparison with actual value. It may be disappointing, but you need to pay 20,000 USD for very colorimetric results (a photo scanner is another story).
You adjusted the exposure / blacks / brightness / contrast etc. in Camera Raw a while ago. Apply the values and the DCP to the photo of your object. If you need to handle the brightness above PRD’s, adjust the exposure.
How about the image? It is the most colorimetric photo you can get without spending 20,000 USD.
Appendix
This is the comparison of two cameras, Olympus XZ-2 (upper) and Canon EOS M2 (lower).
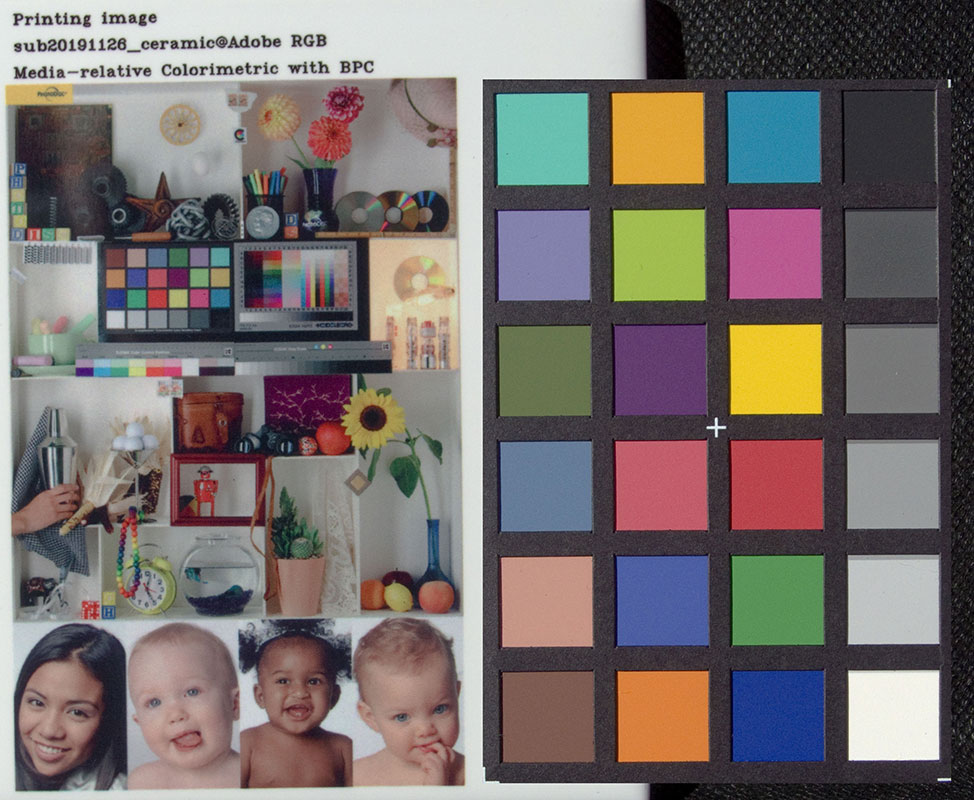
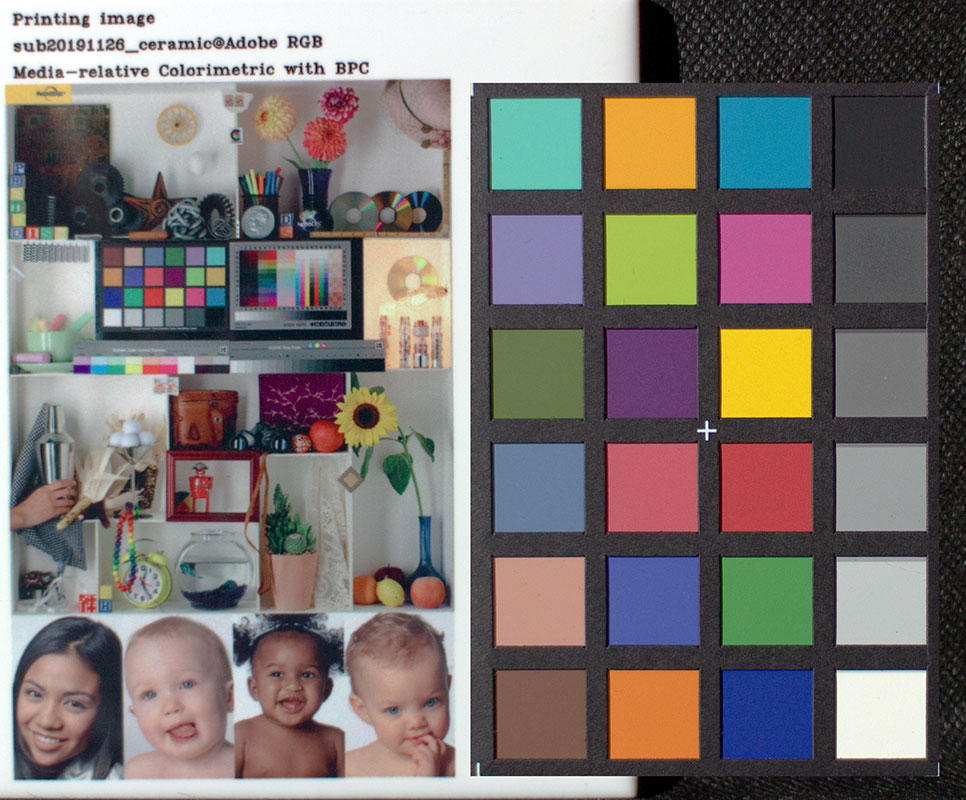
The difference is very noticeable. Canon EOS M2 looks more faithful in my eyes.